You know, Microsoft has provided us many useful tools for creating a wonderful presentation. The Shapes is one of them. There are more than 100 shapes preset in PowerPoint, like cycle, rectangle, triangle and other basic shapes.
Usually we use these shapes as buttons or hyperlinks. Indeed, you can also use these shapes to crop a picture in PowerPoint. How to do it?
Method 1: Insert Shape first.
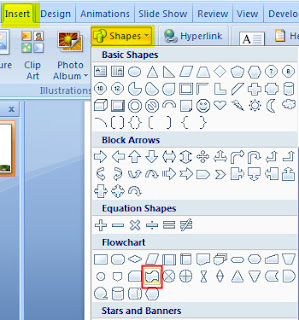
Step 1: Choose any shape from: Insert > Shapes. Drag your mouse and draw the shape.
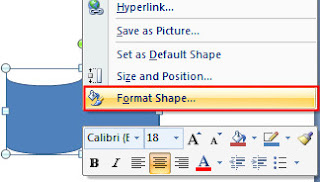
Step 2: Right click on the shape and choose Format Shape.
Step 3: In the Fill tab, choose Picture or Texture Fill.
Step 4: Click Insert from File…, and select the picture you want to crop. Now you will see the picture be cropped like this:
Method 2: Insert picture first.
Step 1: Insert the desired picture: Insert > Picture.
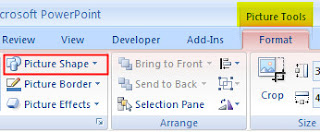
Step 2: Select the picture, and from the Picture toolbar, click Picture Shape, and from the drop down lists, choose a shape.
Then you will also see the picture like below:
Links:
Subscribe to:
Post Comments (Atom)


No comments:
Post a Comment